

If your customer decides they would like to change the date or time of their booking, you can easily make this change within Bilberry.
What’s the difference between moving an order and rebooking?
-
Moving an order moves the booking to a different trip using the same product.
-
Rebooking an order updates the booking to a different product. Check out
Rebook Orders for more information.
Move an Order
-
Navigate to the Order you want to move. There are two ways to find your order:
-
From the Order List: Go to Dashboards → Order List → Search for the order.
-
From the Calendar: Go to Calendar → Month → Select the trip → Select the order under Bookings.
-
-
Click the gear icon
-
Select Move Orders.
-
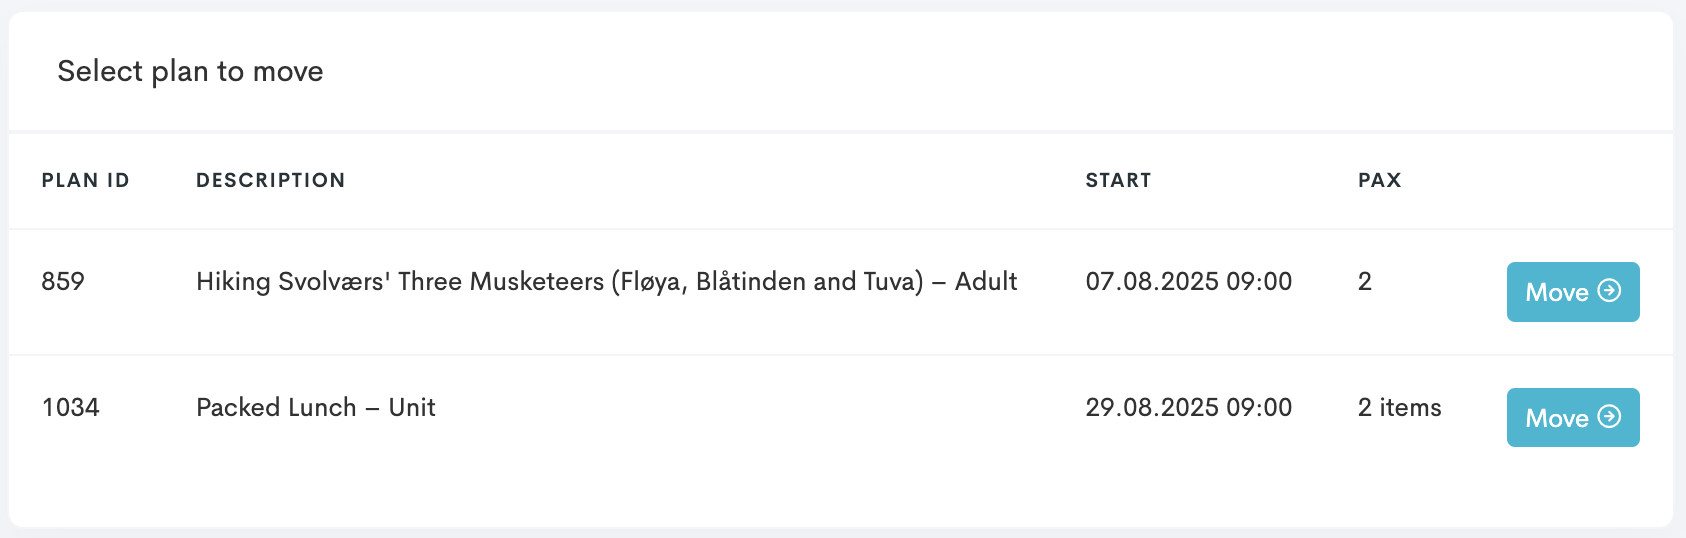
Click Move to confirm the orders you want to move.
-
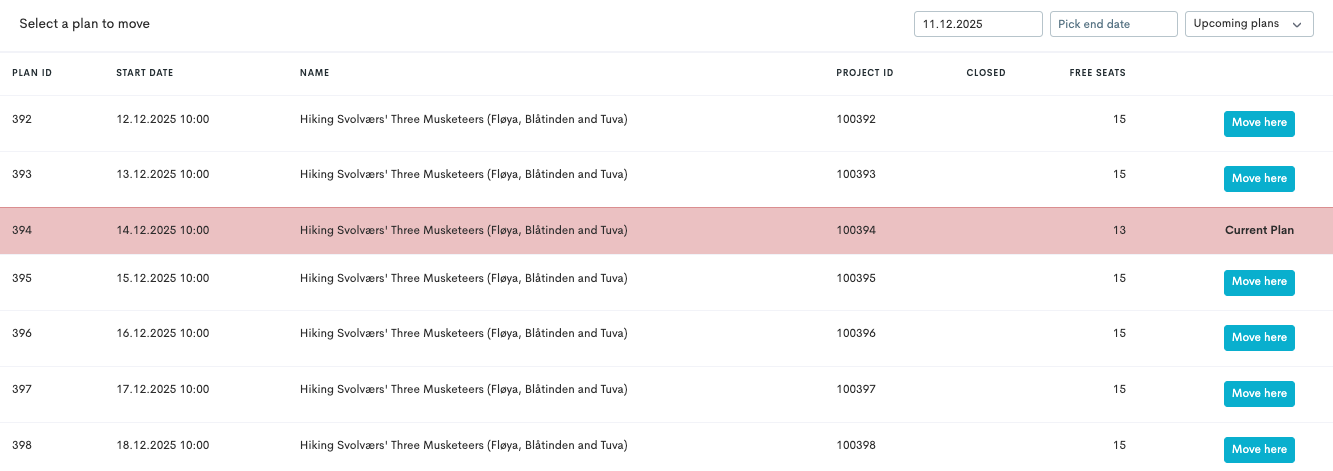
In the list under Select a Plan to Move, pick a start- and end date for the system to search the plan where you want to move the order to.
-
When you find the date and time you want to move the order to, click Move here to the right of the plan.
-
Select the tickets for the new order that correspond to the same ticket types as the original order. These must always match.
💡 Example
This booking has 2 adult tickets, therefore Adult is chosen for the new tickets.

-
Click Move order. A notification will appear in the top right corner confirming the order was moved successfully.

If there are several products in the order, as in the example below, you will need to repeat the process explained in steps 3-7 for all products that should be moved.
Move Several Orders in One Go
When a tour is being cancelled, re-scheduled (due to e.g. weather) or overfilled, it is sometimes needed to move many orders at once without any other changes being made.
-
Navigate to the specific tour where you want to move bookings from.
-
Find the Bookings section.
-
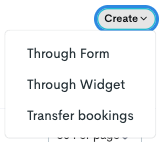
Click Create.
-
Click Transfer bookings.
You are taken to a new page where you will have to proceed with a few more steps.
-
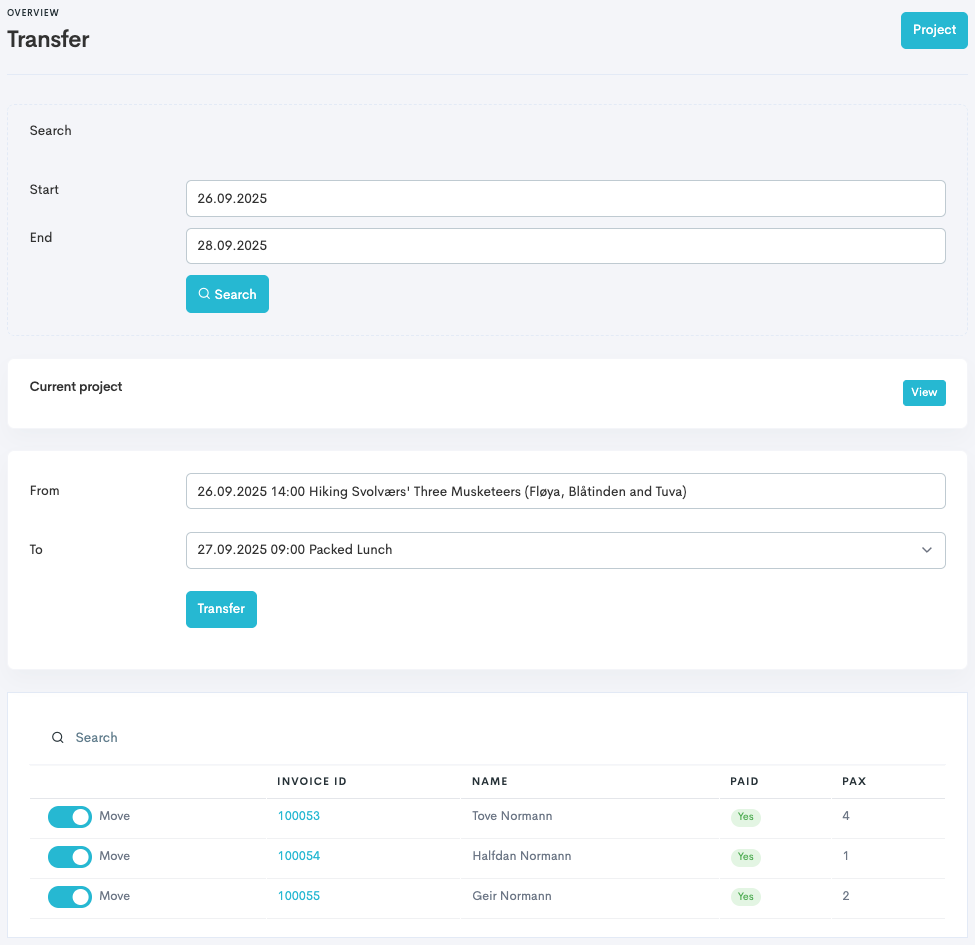
Select the search range for the system to search for and suggest available tours you can transfer the bookings to.
-
In the To-section, select the tour from the drop-down menu to move the bookings to.
All bookings are toggled to join the transfer as a default. Go down to the last section of the page and un-toggle the bookings that should not join the transfer, if there are any applicable.
-
Click Transfer.
The system auto-maps ticket categories; if there are mismatches between the past tour and the new tour, you will need to fix these by clicking Fix on all suggested areas.
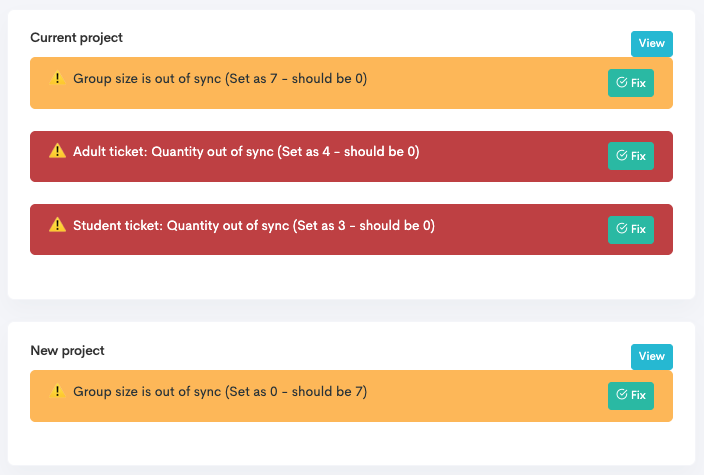
When this is done, you can click View in the Current project section to view the new tour and all transferred bookings.
Log
Whenever an order is moved, the action will be logged for easy reference. This log will be showing in the invoice/order view, all the way on the bottom, after a move has been done. The log includes:
-
Date & time when the move happened.
-
User who performed the move.
-
From → To plan details.