

Several elements must be in place before a product is ready to be sold; this guide compiles all steps into one article.
Products are your inventory, such as activities, accommodation, rentals, and tickets. Our platform offers various options and settings to tailor products to your needs.
Step 1: Add Destination and Location
Please read the Locations article to learn how to create destinations and locations to connect to your product.
Step 2: Add Product Categories
Please read the Product Categories article to learn how to create product categories to connect to your product.
Step 3: Add Price Categories
Please read the Price Categories article to learn how to create price categories to your product.
Step 4: Create a New Product
How to create a new product:
-
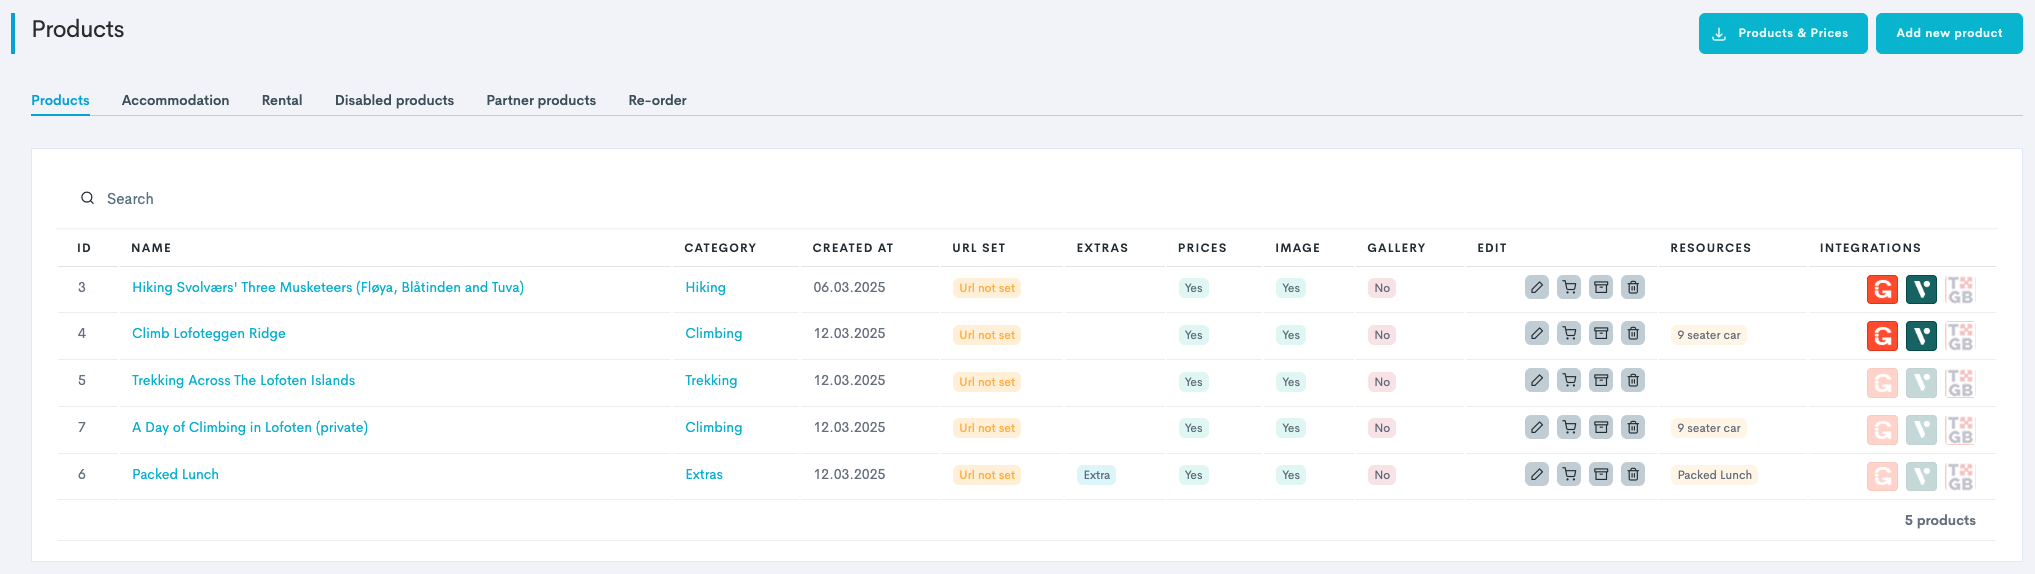
In the left main menu, navigate to Products → Products. This takes you to the Product Overview:
-
Click Add new product.
-
Select the Category of the product.
-
Type in the Name of the product.
-
Choose the Product type, based om what type of product it is you are creating:
|
Field |
Description |
|---|---|
|
Standard |
Typical activities, adventures, or tours booked at a set time and date. |
|
Accommodation |
Products booked overnight with a start and end date, eg. cabin rental. |
|
Rental |
Products booked by the day, eg. bike rental. |
|
Timeslot |
Products booked by time slots, where each time slot has a set capacity, eg. sauna. |
-
Click Create. The product will appear in the product overview.

The product is now created, but still requires further configuration.
Step 5: Configure the Product Settings
After the product itself has been created, it is needed to configure its settings, prices, availability and product information/translations.
To access the product settings from the product overview, click the Edit button (or the product title) on any product to be able to do edits to your product. Inside the product, there is a long list of tabs:
You will start on the first tab, Product settings, and work yourself to the right through the tabs.
Product Settings
-
Inside the product, navigate to and click the Product settings tab.
-
Go through and update the General settings of the product:
|
Field |
Description |
|---|---|
|
Category |
Internal product category (for reporting purposes). This was already added upon creating the product, but can be changed. |
|
Name |
Internal product name. This was already added upon creating the product, but can be changed. |
|
Internal description |
Describes the product internally. This is not customer facing. |
|
Standard cutoff time |
The time before departure when booking closes. 1 day = 24 hours. It is also possible to set the cutoff to After start. This is often used for museum tickets, where customers are able to drop-in throughout the opening hours. |
|
Standard cancellation time |
The time before departure when a booking can be canceled.
⚠️ Nets and Stripe require updated cancellation policies available on your website. We recommend this as well. |
|
Minimum entrants |
The smallest number of participants needed for the activity to take place. For example, if set to 3, the first booking coming in needs to have three or more tickets to go through. After that number is secured it will be possible to book one and one. |
|
Maximum entrants |
The largest number of participants allowed for the activity. When this number is secured, the system will close the tour. |
|
Resources |
Connects a resource to the product. |
Updates are not saved automatically. Be sure to Save changes (at the bottom) as you go.
-
Go through and update the Widget settings:
|
Field |
Description |
|---|---|
|
Online Sale? |
|
|
Widgets and API? |
|
|
Difficulty (Optional) |
Appears in some widgets. Can be managed in the Icons tab. |
|
From price? (Optional) |
Appears in some widgets. Can be managed in the Icons tab. |
|
From age? (Optional) |
Appears in some widgets. Can be managed in the Icons tab. |
|
Standard duration |
Determines the trip duration and must be accurate. It appears in some widgets. For example, if a tour lasts 3 hours and the product availability starts at 12:00, the tour ends at 15:00. ℹ️ 1 day = 24 hours. The system is like a clock. If your tour passes midnight, it spans two calendar dates. |
|
Bundled products? |
Also called Associated products. Appears at the main product checkout, allowing customers to add the associated product to the cart and pay together. |
-
(Optional) Go through and update the Operations settings:
|
Field |
Description |
|---|---|
|
Need staff? |
|
|
Guide Tags |
Only guides with the selected tags can be scheduled for this product. |
-
(Optional) Go through and update the Advanced settings:
|
Field |
Description |
|---|---|
|
Is a timeslot product? |
|
|
Send booking alert? |
|
|
Min. booking quantity |
Sets the duration of the time slot by setting the quantity of time slots customers buys in one go. 1 time slot = 30 min. Enables a drop-in time every 30 min (12:00, 12:30, 13:00 etc.). For example, set to 3 will make the duration of the drop-in to be 1,5 hours. |
|
Is rental? |
|
|
Is accommodation? |
|
|
Package? |
|
|
Itinerary heading? |
Include the product as an itinerary intro for private events. |
|
Resale? |
|
|
QRcode mode |
This setting determines how the QR code is generated.
For example, if you have your own QR-code scanning implementation (e.g. your own app), the string option is for you. |
|
Cost collection |
You can create and add a cost collection to the product, which makes it possible to compare costs and income in financial reports. |
-
Go through and update the Location settings.
|
Field |
Description |
|---|---|
|
Location |
Location of the product. |
|
Meet up address |
The address to where the customer should meet up. |
|
Map? |
Use the map to drop a pin where the location is. Drag and zoom on the map to find it manually, or click the |
Remember to click Save changes before moving onto the next tab.
Prices
It is important to add prices to your product, to determine what customers should pay.
-
In the product overview, click the Edit button (or the product title) on any product.
-
Inside the product, navigate to and click the Prices tab.
-
In the Prices section, enter the ticket Name and select the Price category.
-
Click Add.

Repeat steps 1-3 to add several different prices for the ticket, eg. Child or Senior.
-
In the Price items section, enter the price item Name, Price (amount) and VAT percentage that should be making up the total price.
-
Click Add.

Price items are components of the ticket price, breaking down the total into distinct items. You can add prices to a product in two ways:
1️⃣ Split up the total ticket price into several price items with different VAT rates. For example, accommodation, transport, guiding, food, equipment rental etc.:
2️⃣ Sell the ticket as a whole, with one VAT and no further splitting up the price items:

Repeat steps 4-5 to add several price items for the price.
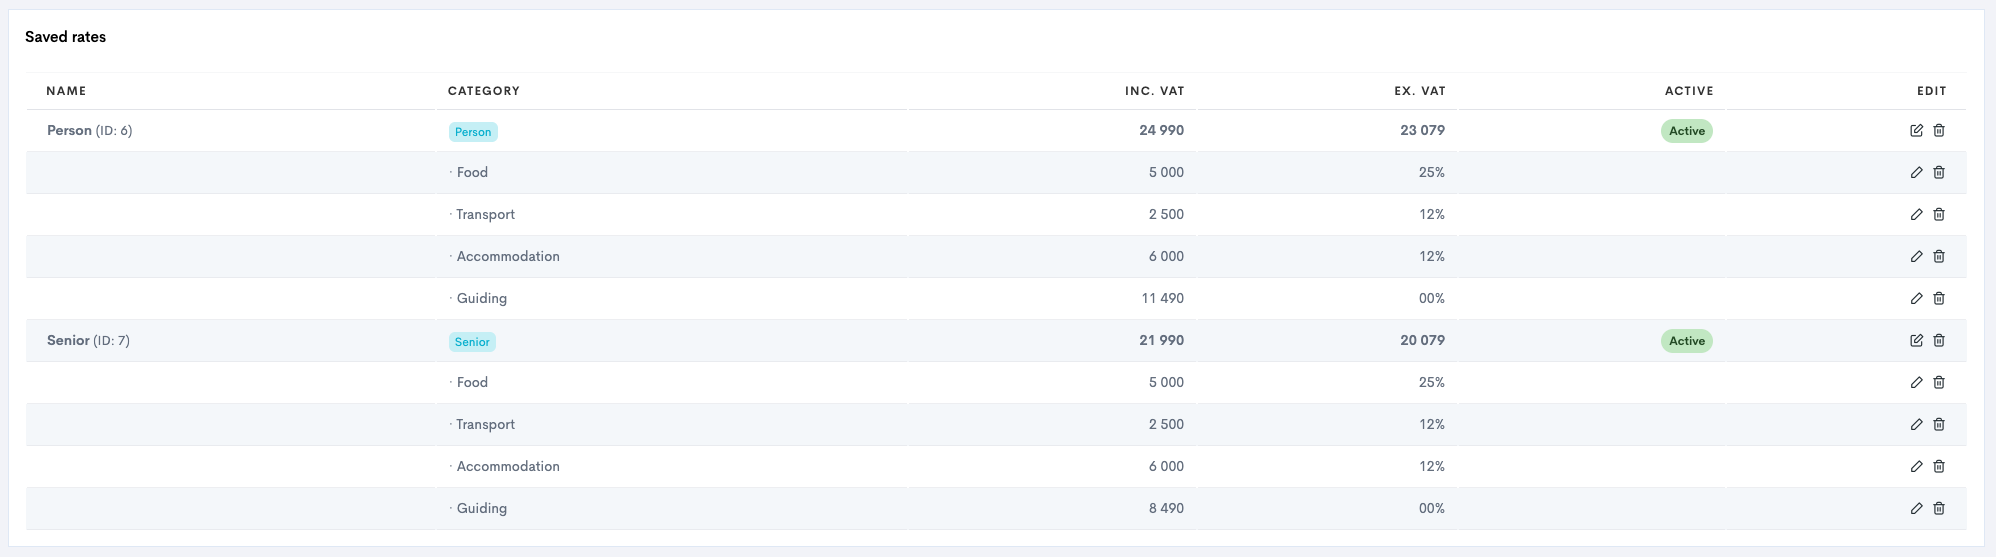
Edit Price Settings
How to edit the price:
-
In the Saved rates section, click the Edit icon
-
Click Update.
How to edit the price items:
-
In the Saved rates section, click the Edit icon

-
Click Update.

Repeat steps 1-2 to add or edit the price and 3-4 to add or edit the price items.
Availability
-
Inside the product, navigate to and click the Availability tab.
-
Follow the steps in our guide Create Product Availability to complete this setting.
Questions
-
Inside the product, navigate to and click the Questions tab.
-
Follow the steps in our guide Guest List Fields and Order Fields.
Product Images
-
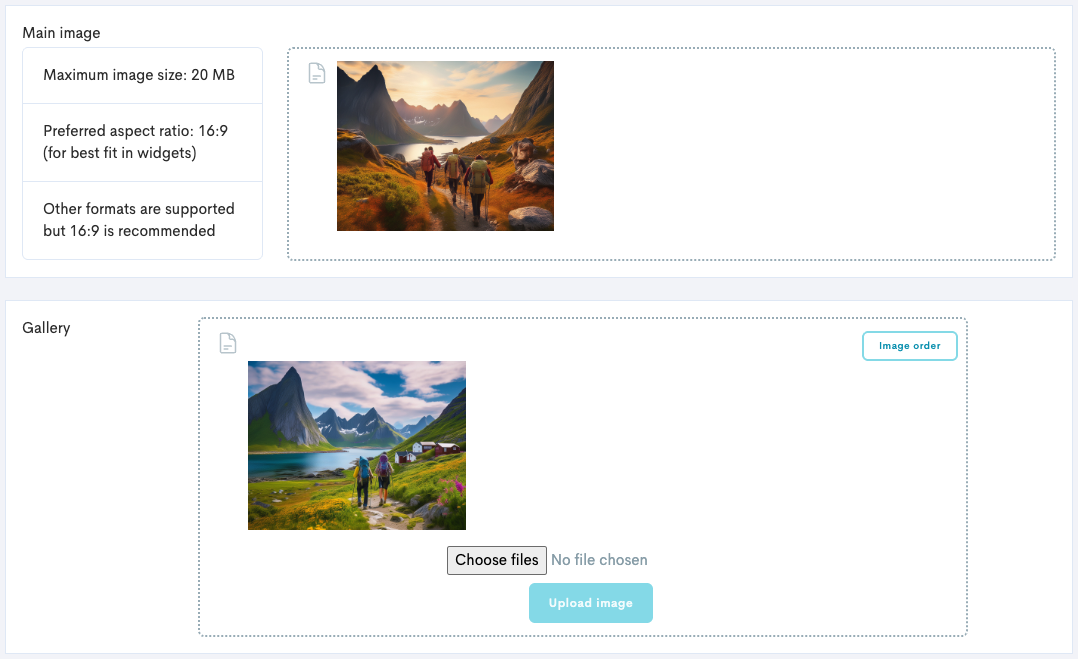
Inside the product, navigate to and click the Product images tab.
-
Upload your Main image by clicking Upload and selecting the image from your computer. This image will show in some types of widgets, and is the most frequently used one.
-
(Optional) Upload a Gallery of additional images by clicking Upload and selecting the images from your computer. This will show in some types of widgets, and we recommend to upload between 4-6 images.
-
Click Image order to reorder your uploaded gallery photos.
-
Guide Threshold
The Guide Threshold tab only becomes activated if Need staff? is toggled on in the Product settings tab.
-
Inside the product, navigate to and click the Guide Threshold tab.
-
Follow the steps in our guide Set Guide Threshold.
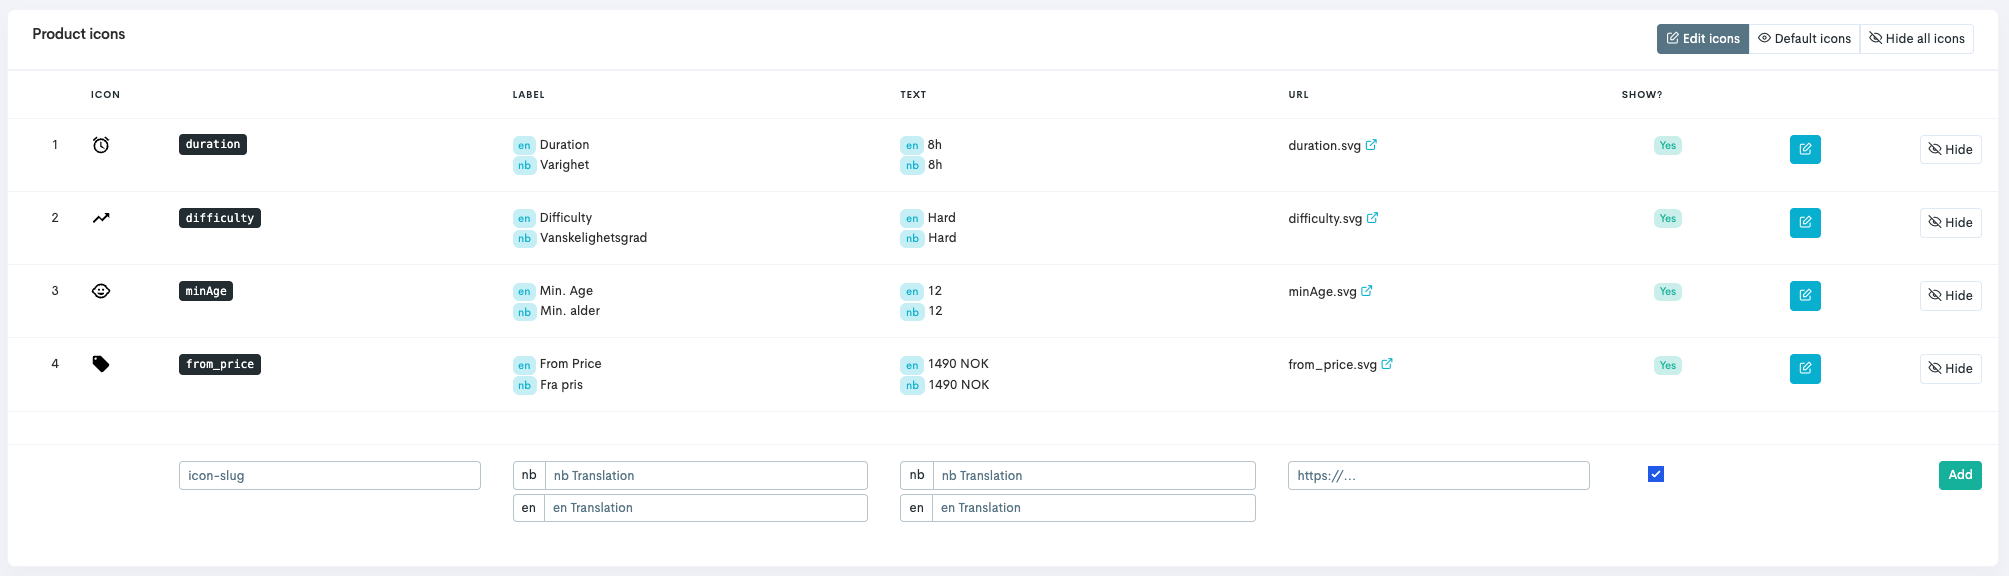
Icons
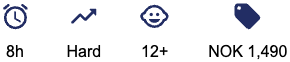
Icons are displayed in widgets, and are visually displaying information that is vital for the customer to know.
By default, your widgets will automatically display icons for duration, difficulty, minimum age, and from price. You can customise, hide and add your own icons.
-
Inside the product, navigate to and click the Icons tab.
-
Click Activate editing of icons. Your tool for editing your icons will appear:
-
Make changes to the different icons:
-
Edit the icons by clicking Edit. It is possible to upload and use your own icons. Click Save when done.
-
Hide the icons completely by clicking the Hide icon.
-
Translations
-
Inside the product, navigate to and click the Translations tab.
-
Follow the steps in our guide Product Information and Translations.