

Price Categories are the ticket options customers select when booking your product.
As an example, you can add Adult, Student and Child as price categories, and later add different prices to the different price categories.
➕ Add New Price Category
How to add a new price category:
-
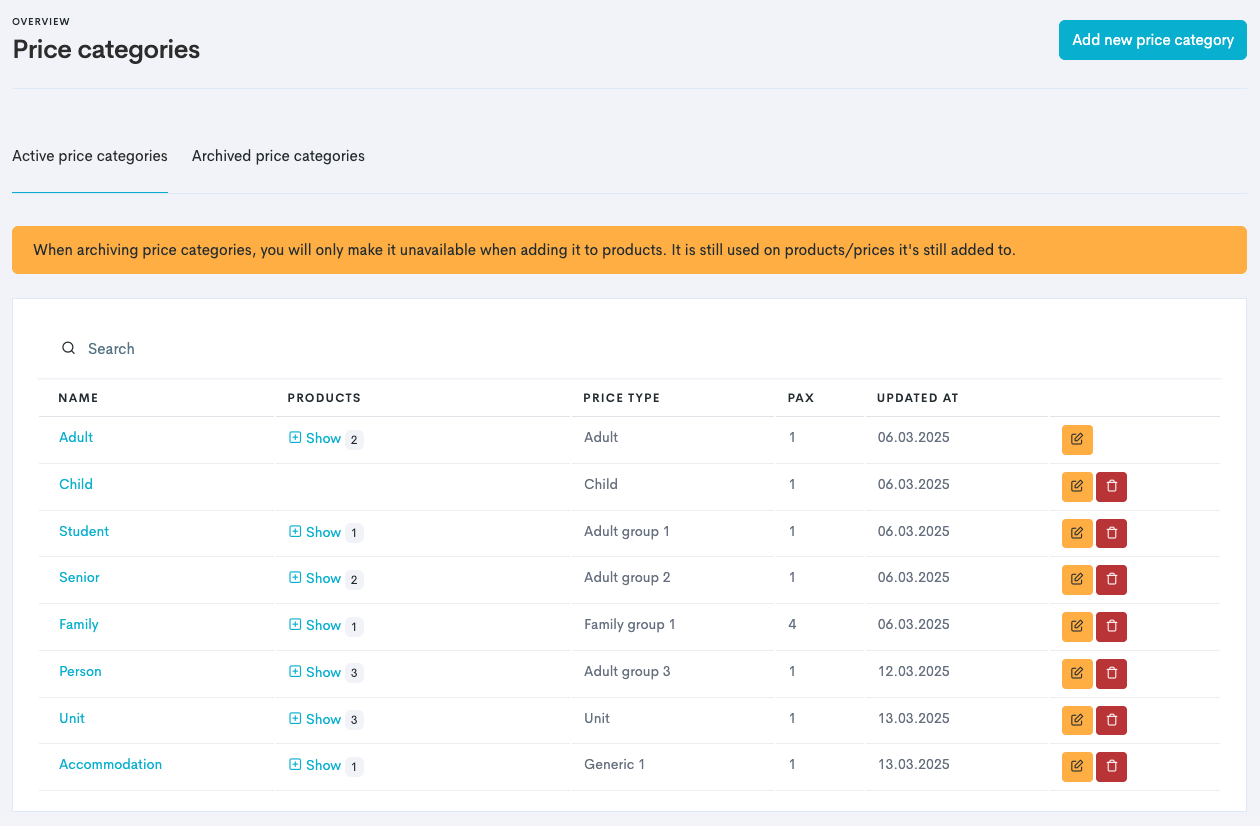
In the left main menu, navigate to Products → Settings → Price Categories.
-
Click Add new price category.
-
Add the required settings for the price category:
|
Field |
Description |
|---|---|
|
Name |
This is what your customer sees in the widget when booking. |
|
Minimum/Max age |
Add if this ticket has age restrictions. |
|
Price Type |
Labels the system to distinguish different prices. ⚠️ Create price categories with different price types, ensuring no price category has the same type. |
|
Occupancy |
Specifies how many seats one ticket occupies in the tour capacity. For example, a family ticket for 4 people should have 4 here. |
|
Guests |
Specifies how many guests one ticket counts as when booked. Usually matches the Occupancy number. |
|
Is pax? |
⚠️ Guest list fields do not show when toggled off. |
-
Click Create.
The new price category will appear in the price category overview. Finally, add translations to the price category:
-
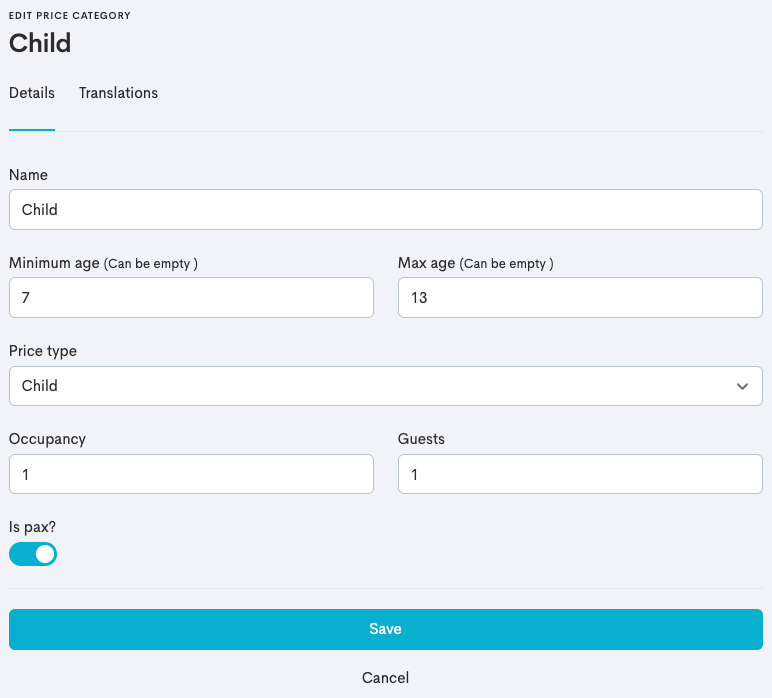
In the price category overview, click the price category name.
-
Click the Translations tab.
-
Add language translations for the specific price category. This appears as the ticket option in the widget on your website for customers, and follows the websites' currently selected language.
For every web language added to your system, make sure to add translations on each price category you create. When adding a new language, provide translations for this as well.
Please read more about languages in the Web Language article and the Product Information and Translations article.
Deleting price categories moves them to the Archived price categories tab, where you can reactivate them if needed.