

If you need to do edits to a product, like prices, cutoff time or project statuses, you must always edit the availability (tour periods), not the product itself.
The product acts only as a template for creating availability and does not affect them after they've been created. Any changes made directly to the product will not apply to existing availability.
If the change is a lasting change, we recommend editing both the product (template) and the availability – this secures that new availability that is created with the new changes.
After you have created a tour period, you will not be able to edit the date. If you need to change this, simply delete the one you made wrongly and create a new.
Need to create a new tour period? Check out our Create Product Availability guide.
Edit a Tour Period
-
Navigate to the tour period, using one of the following paths:
-
Navigate to the Product (Products → Products → Select the tour series you’d like to edit).
-
Navigate to Projects → Tour Periods.
-
-
Click the View tour period

-
Click Show actions in the upper right corner. Different edit settings appears.
-
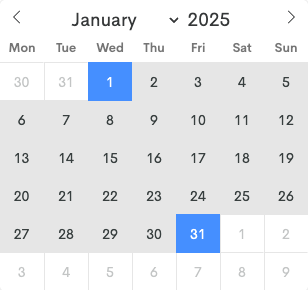
Click the Update Dates dates, and select the period you want to do edits for. Default is the whole tour period.
-
Follow with doing the changes you want to do:
|
Setting |
Description |
|---|---|
|
Set start time and duration |
Edit the start time and the duration of the tour. |
|
Set Locked status on tours |
This locks/unlocks the tour as it is now, with settings etc.
|
|
Set status on tours
|
Confirmed will make the tour bookable online via your widgets and will appear in your back office Calendar. This is default and our recommendation of usage. Registered will make the tour not bookable online, but the tour will still appear in your back office calendar. Disproved will make the tour not bookable online, and will remove the tour from your calendar completely. |
|
Set Visibility of Tours |
This hides the tour from the widget. Online customers cannot book, but agents who have access to the back office can book through your calendar. |
|
Set Availability of Tours |
Closes the tour at capacity, but opens if there are refunds. This is what happens when a tour becomes full, for example. |
|
Set waiting list status on tours |
Activates a Waiting List on the tour(s).
|
|
Need staff |
Creates a reminder to add staff/guides on the specific tour. |
|
Set cut off time of tours |
Length of time before departure that a booking can no longer be made. |
|
Before start/After start |
Sets the time before or after the starting time of the tour series. Example: If the starting time of tour series is set to 13:00 and you put 2 hours before start will make the tour bookable until 11:00. If you put 2 hours after start will make it bookable until 15:00. |
|
Set max/min entrants tours |
The largest or smallest number of participants allowed for the activity. |
|
Add/remove resources to tours |
Add or remove a resource to a part of or the whole tour period. |
|
Add/Remove guides to tours |
Add or remove a guide to a part of or the whole tour period. |
|
Change name of tours |
Change the product name during a specific period. |





-
Click Update/Add/Remove to ensure changes are saved.
Be sure to wait until a green success message pops up up in the right corner giving the information that changes were saved!
Edit Prices
-
Navigate to the tour period, using one of the following paths:
-
In the left main menu, navigate to Products → Products → Select the tour series you’d like to edit.
-
In the left main menu, navigate to Projects → Tour Periods.
-
-
Click the Edit tour period prices

-
Click on the dates by Update Dates, and select the period you want to do edits to. Default is the whole tour period range.
In the Available Prices section you will see the different price categories available for the tour (in this case Adult, Senior and Child). Here you can update both the price amount and the VAT percentage.

-
Go to the Price field of the price category and edit the price.
-
Click Update.
Repeat step 5-6 if you have several price categories to update.
Be sure to wait until a green success message pops up up in the right corner giving the information that changes were saved!